Showing posts with label crafts. Show all posts

Tuesday, May 18, 2010

Mock Canvas

I meant to make this into a tutorial with step by step photo's. I got so caught up in the project, I only took 1 photo and that was this one!
What you will need is a canvas, a paper cutter, a saying or a picture, and modge podge.

1. Print out your picture and trim down to the exact size of the canvas.
2. Spread a layer of Modge Podge onto the canvas and lay the picture down. Make sure you have it even all the way around.
3. Push out any air bubbles in the paper and wait for it to dry. I only waited about 20 minutes.
4. Spread a thin layer of modge podge on top of the paper and let dry completely.


I roughed up the edges on this picture. I did that because I messed it up. I had just a teeny bit hanging over the edge of the canvas. I tried to trim it off and messed it up, so I roughed up the whole picture. I actually like the way it turned out.

Sorry for the hand. I couldn't get a good angle without glare. But here is one I did with some clip art off of Sugardoodle. It has the 2010 Mutual theme on it. I am going to make some more of these to go in our camp store this year. I hope the girls will like them.
I just typed up the Keep Calm sign, but for a printable one, you can go here. I thought hers were cute, but they just weren't what I wanted. I would share but mine, but sadly I am having some computer problems. The font I used was Rockwell and it's size 100.
These seriously look like real canvas pictures. Easy and cheap! My kinda craft. I found my canvas at the Dollar Store a while back! I went back yesterday to get more and they didn't have any, but you can also get them at Micheal's or Roberts. Remember your coupon!!

Monday, May 17, 2010

Another Frame Makeover


I didn't get a beginning picture of this frame. It had chickens in it and the frame was white.. I made this for my sister-in-law who was married over the weekend. I am loving it. The vinyl is from Scribble It. Incidentally, Cammie just moved into my tiny town. I need to get her some cookies! I am so excited to have her just down the street. Her shop is closed until the first of June, due to her recent move, but you should go check her out. She has great craft kits and lot's of fun ideas!

Wednesday, May 12, 2010

Caterpillars

There are caterpillars everywhere in my yard. The other day we had the neighborhood kids collecting them in Mason Jars. At one point we had 28 of them. Kinda gross!

But the kids sure do love them. Today I did a fun little craft with the 2-year-olds.
Easy and these guys did it well. I had to help little Miss Mia along, but Piper, who is almost 3 did really well by herself. The only thing I did for Piper was glue the eye's on.
Grab a tongue depressor, a glue stick and some pom-poms. Simply glue pom-poms all the way down the stick. Add some googly eye's and you've got a darling Caterpillar.

Monday, May 10, 2010

Target Knock-off

Loving this! It's at Target for $40.00.
Love this even better! It's a free download from Comfort Zone! Make yourself one for under $5.00!! Plus, chose the size you want. What a great present for the teenager in your life! I'm so making one for my niece for her birthday in August!

Tuesday, April 27, 2010

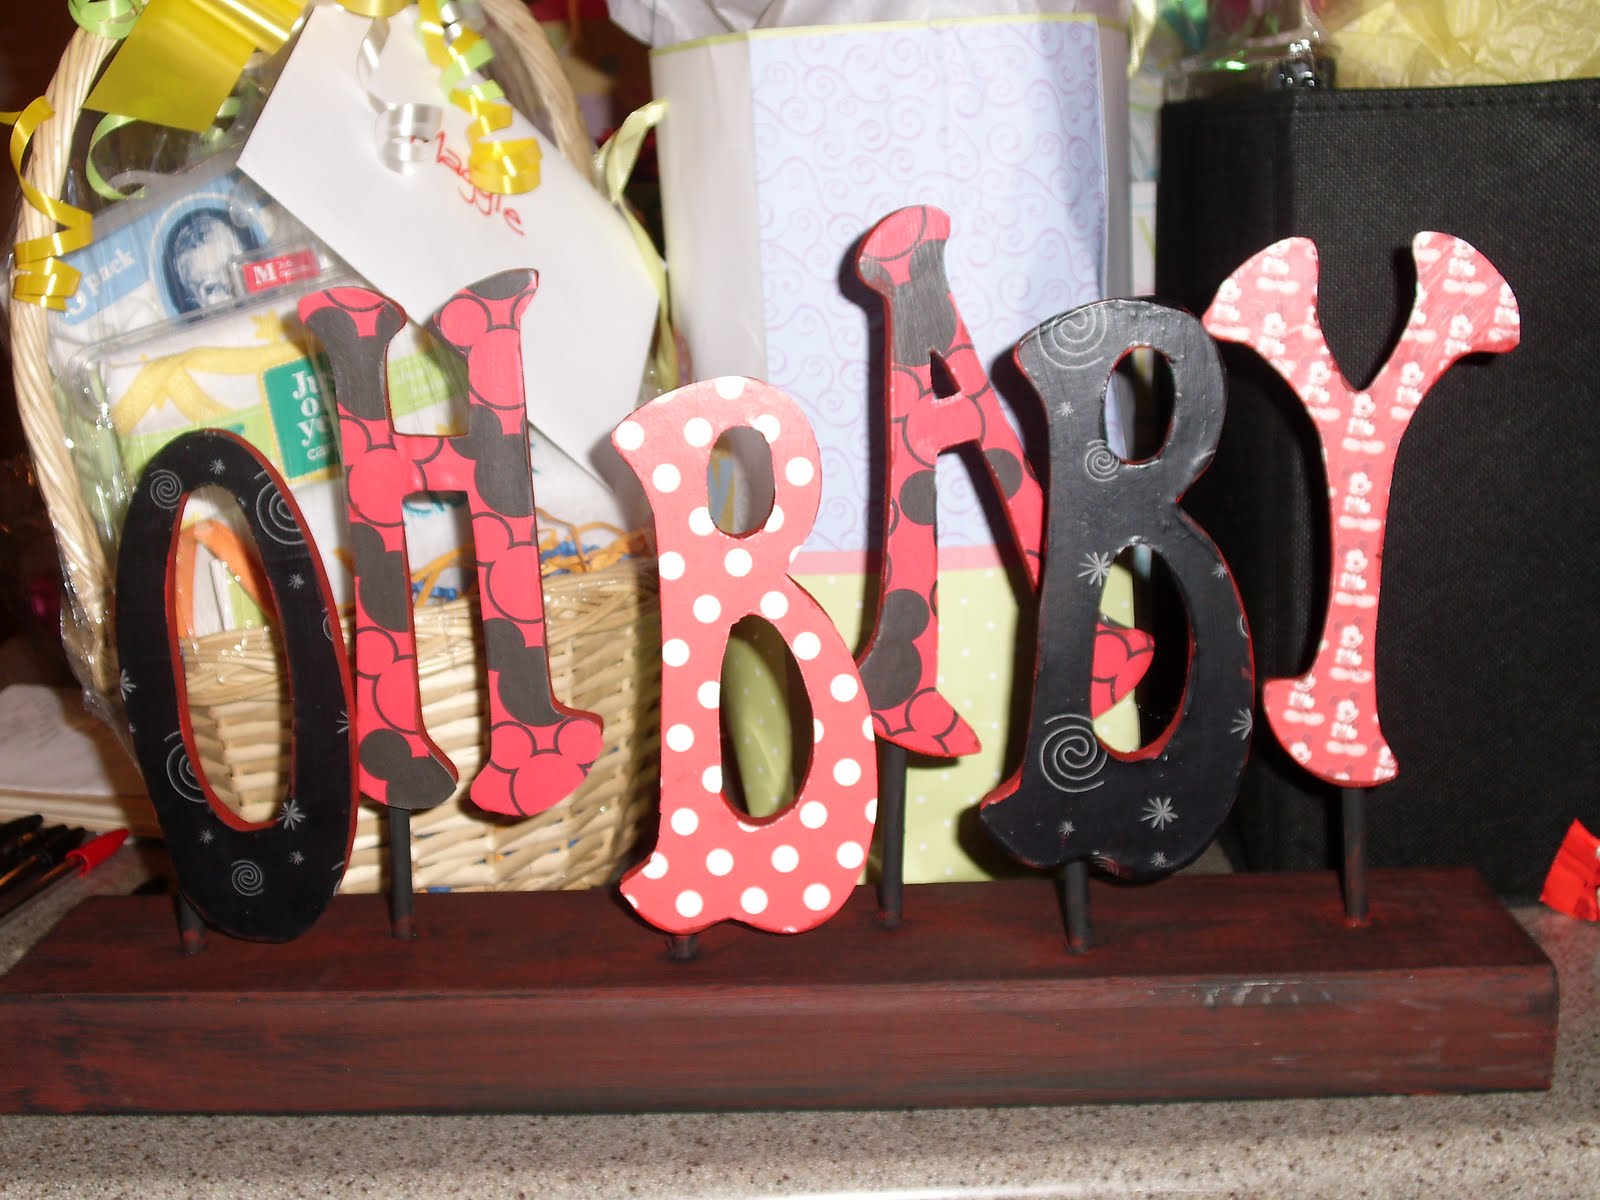
Oh Baby Centerpiece

I got the idea for this little jem at Real Parties. I took the idea and made it my own. This was a fairly inexpensive little project. I got the letters at Joannes for $1.29. Then my sister-in-law, Kris and Mandee and I got together and modge podged the letters with cute paper.

Now, I have to say, I wanted to make this in fun pastel prints so it would match the shower. But the mommy-to-be is a Mickey Mouse addict and her nursery is in Mickey Mouse. So Mandee suggested making it as a gift, so she could put it in the baby's room! Great idea! And that is the explanation for the dark colors!

I should have taken pictures of each step. Sorry! I used a 2x4 for the base and cut it 1 and 1/2 feet long. Then I sanded it a little bit. I cut the dowels, and I didn't measure them. I just cut 3 of each. Then I used a 1/4 inch drill bit to drill the holes. I laid each of the letters out and marked where I wanted to put each hole.
When you finish with that, put our dowels in and use a hammer to get a tight fit. Then I painted everything black and dry brushed a layer of red over the top of the base. I just used hot glue to attach the letters.
Super cute!!

Tuesday, March 23, 2010

Scratch n' Sniff Paint

First of all, I am not sure where I got this idea. I honestly have no idea, I think it was Family Fun. I know it was awhile ago that I saw it. I din't bookmark it, but I am pretty sure it was there, but I can find it nowhere!! But if you know where it originated, please let me know so I can give proper credit. It's been filed away in the back of my brain for awhile.


All you need to do this craft is packages of kool-aid and water. I used about 1/2 a pkg. of kool-aid to 3 Tbsp. water. You can use more or less, depending on how thick you want to make it. This smells so yummy!! That is the best part. But be careful because it does stain hands and I am sure it does clothes too!


Piper sniffing her paint. This may be a bad habit to form!! You will want to use cardstock because it did bleed through the paper quite a bit. We did cardstock after the first round of painting was done and it worked much better.


Such an easy boredom buster. And the kids can enjoy smelling it for weeks!!
Notice we also made Apple Jack necklaces. Sometimes I forget it's the simple things that kids enjoy so much. They had a blast making them and it was a great play date.

Monday, March 22, 2010

Rolled Flower Tutorial

I've had a few people ask me if I have any tutorials on flowers. Nope, but I said, I'd make one. And I remembered why I hadn't done a tutorial, they take forever!! But since I love you guy's, I did one up for the rolled flowers. I originally got this idea from a headband I bought a boutique. It's alot looser than the one's I have been making, but I really like these.
They are so easy and so pretty.
You'll need. Two felt circles that coordinate with your material. The bigger of the two is the one you will use as your base for the flower. Then your scissors and glue gun. You could also use fabric glue if you wanted to. I tried it and it didn't work nearly as well as the trusty old glue gun.

Depending on the size you want your flower, your going to tear yourself a strip of material, about 1 to 1 & 1/2 inches wide. For this large flower, my fabric was 45 inches. For a tiny flower, you might only use about 12. I always figure that if I want to finish the flower off, I will just trim the excess material off.
Put a dab of glue in the center of your felt. You can tie a knot in your material and place it onto the glue, or you can simply stick the material to the glue. I do it that way, because it makes it easier to put buttons into the center later on.

Your going to take your material and start twisting it around itself. I do a few inches at a time.

Then you simply start to roll it around the center piece and glue the fabric to itself. You can glue it directly to the felt, and you will want to do that every couple of times you glue, but not every time or else it gets to hard and not pliable.


And from here, you just keep twisting and gluing until you get the desired size of flower you want.

Sorry, I should have cropped this to get a closer picture. But here is what your back will look like when you are done. If you have extra felt sticking out, just trim it off.

And this isn't a great shot either, but take the end of the material and simply tuck the ends into a the last twist you did and glue it.
The best place I have found to get clips is to buy them at a beauty supply store, like Sally's. I got 100 clips for $5.00. But here you'll take your second felt circle and stick it in between the the prongs of the clip. Now put a liberal amount of hot glue to the top of the felt.
Then stick it to the back of the flower. I put the felt in between the flower and the prongs because then you don't have to mess with getting the glue perfect and it doesn't get caught in your hair.

Now add a button and glue it to the center and you have a darling rolled flower. These are super cute when attached to a headband. Like the Mellow Yellow headband I listed in the giveaway. They are also cute on clothes, bags, and just about anything else you can think of. I have another project to show you with these, but I don't want to give anything away!!
Hopefully this made sense and helps someone out. Happy flower making!

Wednesday, February 17, 2010

My new Obsession: Fabric Flowers

I'm obsessed! My husband is freaking out and wondering what we are going to do with all of these flowers. He wants me to sell them, but everyone sells them!! I am just having fun.
This was taken about a week ago, there have been oodles more since then!
This is a fun little no sew flower. You can get the template here. These one's actually take a a bit longer than the ruffle flowers, but if your an anti-sewer, these are the ones for you!

These headbands are so much fun and so easy to make! You don't even need to add the flower, but it's fun to add a little something to it. I followed her measurements exactly and apparently I have a big head!! It's squishing my brain!! So I made some more and added about 2 inches in length and now it's almost to big, so maybe just adding 1 & 1/2 inches next time. This one was way cute on my 2-year-old and fit Mandee's little gal who is 7 perfect.
This is my favorite flower. A little bulky. I actually took it apart to make it smaller. My husband thinks this is way to big to wear, but I tried to tell him that it's the style and big is better!
This is perhaps my favorite one I have made and I just gave it to a friend for her birthday!
I know I am a behind in jumping on this train, but I am loving it! There is definite a learning curve on the flowers. I will do a tutorial on one, because I have kind of changed up a few different set's of instructions and have been making my own. Let me experiment a little and then I will share!!

Tuesday, December 29, 2009

Straw Snakes

This is one of the easiest activities I have ever done!! It seriously took just a few minutes, I had the supplies on hand and Tyson was entertained all day! I originally got the idea from World Preschool Mom. If you have a few minutes today, go check out her sight. She is full of fun and innovative idea's. I will be doing more projects from her blog soon.

What you need is straws and some kind of string. We used shoelaces, it made this activity a little easier for smaller hands, because threading straws onto yarn is hard!! First I let Tyson cut the straws into pieces. Any size he wanted. He had fun because the straws would flip into the air and they were all over my kitchen.

Then you just string them onto your yarn or shoelace. You can do patterns or just random placement. When your done, just tie the ends off and you have a fun straw snake!

Craft Bucket Organizer

I saw this idea a couple of years ago in the Family Fun magazine and knew I had to do it for BayLee. All it is is a bucket(ours is a food storage bucket) and a tool organizer(we found one at Home Depot on clearance). It makes it so easy for her to keep track of everything and it helps her to be more independent when she wants to draw or paint, she can just pull out her bucket and do it. About once a month I go through the bucket and get rid of the reminants of projects and organize the markers, crayons, etc........ It is so handy and the cleanup is easy enough for her and not overwhelming. We gave it to her for christmas and bought the Crayola stuff in August while everything was on really good sales, so start thinking about easy Christmas presents and this is great!!!!


Friday, December 18, 2009

Igloo's


I can't take any credit for this idea. That all goes to Tyson's fabulous teacher, Marnie. I thought this might be a fun craft for the holiday break.
All you do is take a snowball, frost it with white frosting and then attach mini marshmallows. Add a powdered donut for the door and a few teddy graham's for Eskimo's and you've got one super cool Igloo!

Friday, December 11, 2009

What do you do with empty frames?

Oh, the things you can do with a picture frame. It's amazing the things you can make. My friend, Shelley, makes darling bow holders out of frames. They use chicken wire across the back, similiar to what Creative Crate does.

This is what I did with my empty frame.
I picked this frame up at DI for $2.00. It was missing the backing, so it was just the glass and the frame. I sanded it down and painted it black. Then we used a glue, similiar to Gorilla Glue to glue the glass to the frame. I had this vinyl left over from last year, so I put it onto the glass, and then I hung it above all my nativities.

I LOVE it!! Although, I don't recommend using vinyl that has been sitting. Geez, made this project take a lot longer than it should have, but that's okay. I really do love it! Simple, yet very beautiful!
My friend, Andie, did this with her empty frame. She let her kids make a nativity scene on the glass and then modge podged over it. Super cute and something they will treasure forever, becasue they did it together!

Friday, August 14, 2009

Back to School Bus Craft


We made these for BayLees teacher for the first day of school. She insisted on making one for her first grade teacher also. She just painted an egg carton yellow and used a sharpee for the writing. She wanted to cut pictures out of a magazine for the kids faces instead of drawing them on the popsicle stick. Both ways work fine. We finished it off by adding wheels. The teachers loved them and she thought it was a cool craft too!
Perfect for back to school.

Friday, July 10, 2009

Chunky Paper Flowers


Aren't these cute? I made these to put as toppers on a visiting teaching gift I did. You can get the template here. Hers turned out way cuter than mine and I love the pixty stick idea. That was what I originally planned, but I forgot to grab them so I just stuck these on boxes of cookies.
Didn't have quite the same effect, but it was cute.
P.S. please ignore the date of the pictures, I just realized my kids must have been playing with the camera.
Have a beautiful day!

Tuesday, June 30, 2009

Fourth of July Rockets


These were super fun to make! I got the template from Skip to my Lou. She always has great ideas! When I went to her sight this morning she has a template up for a fun star garland!!

These were pretty easy to make. We printed the template, cut everything out and put the template around a toilet paper roll. However the rolls were a little big and the paper would wrap around but didn't overlap. So we used tape to attach the two sides. I used hot glue to attach the cones on the top and I also glued the fins on. I tried to not glue them and they wouldn't stand.

I also ran out of toilet paper rolls and we printed the template out on card stock and it worked just fine by itself. We just rolled it and taped the seams.
I thought we could use them as decoration, but my 4-year-old has been carrying his around playing with it. On Skip to my Lou, she put a bottom on them and filled them with candy and 4th of July treats. It makes a great boredom buster.

Wednesday, March 11, 2009

Shamrock & Rainbow Wreath


A great St. Patrick's days craft. We made these up in about 30 minutes. I had the kids cut the center out of a paper plate and then color the wreath green. You could paint the wreath, but given the age of 2 of the 4 kids, we opted to color. You can print off the shamrocks and the rainbows in black and white and also have the kids color those. We used the color template and just printed them and I cut them, while they colored the wreath. We used glue dots (best things ever invented) to stick the shamrocks and rainbows to the wreath. The kids used fishing line to attach the dangling rainbows.

We found this idea at DTLK and they have lots of great ideas. For the shamrock pattern we used, click here. For the rainbow's click here.

Tuesday, February 17, 2009

Cute Valentine Frame

Posted by Picasa
We made these darling picture frames at the Valentine Party for my daughters first grade class. They were a hit! The kids were so excited to get their pictures taken and then make the frames for their moms, dads, grandparents, or whomever they wish! A few of the hearts fell off of hers but nothing a little glue won't fix. Actually if I were to do this again I would use...GLUE DOTS!

Thursday, November 20, 2008

Christmas Trees

*This is a Repost but I put it on almost three months ago so I figured they were so cute and we have TONS of new blogging friends.
I made these darling trees for super saturday and they were a big hit. They are very time consuming but the end result is well worth it.


These cute trees were so much fun to make. I had a friend in my ward find these cool trees in the Oriental Trading Scrapbooking catalog and wanted to make them for super saturday. I called Brandy right up and asked her if she by chance had seen anything on any blogs she had been too ,about how to make them. She quickly reminded me that they were on Abbys page at A Feathered Nest. They were so easy to make but quite time consuming. With all the interruptions I have (love the children) it took three nights. I just did a tree a night, way fun and theraputic. The supplies are just scrapbooking paper, pins, and styrofoam cones. Go check out the tutorial at A Feathered Nest, she explained it wonderfully. The ladies at church were pretty excited about them-YIPPEE!!!