
Showing posts with label Craft. Show all posts
Showing posts with label Craft. Show all posts
Monday, July 4, 2011
Make a Bouncy Ball

Friday, June 17, 2011
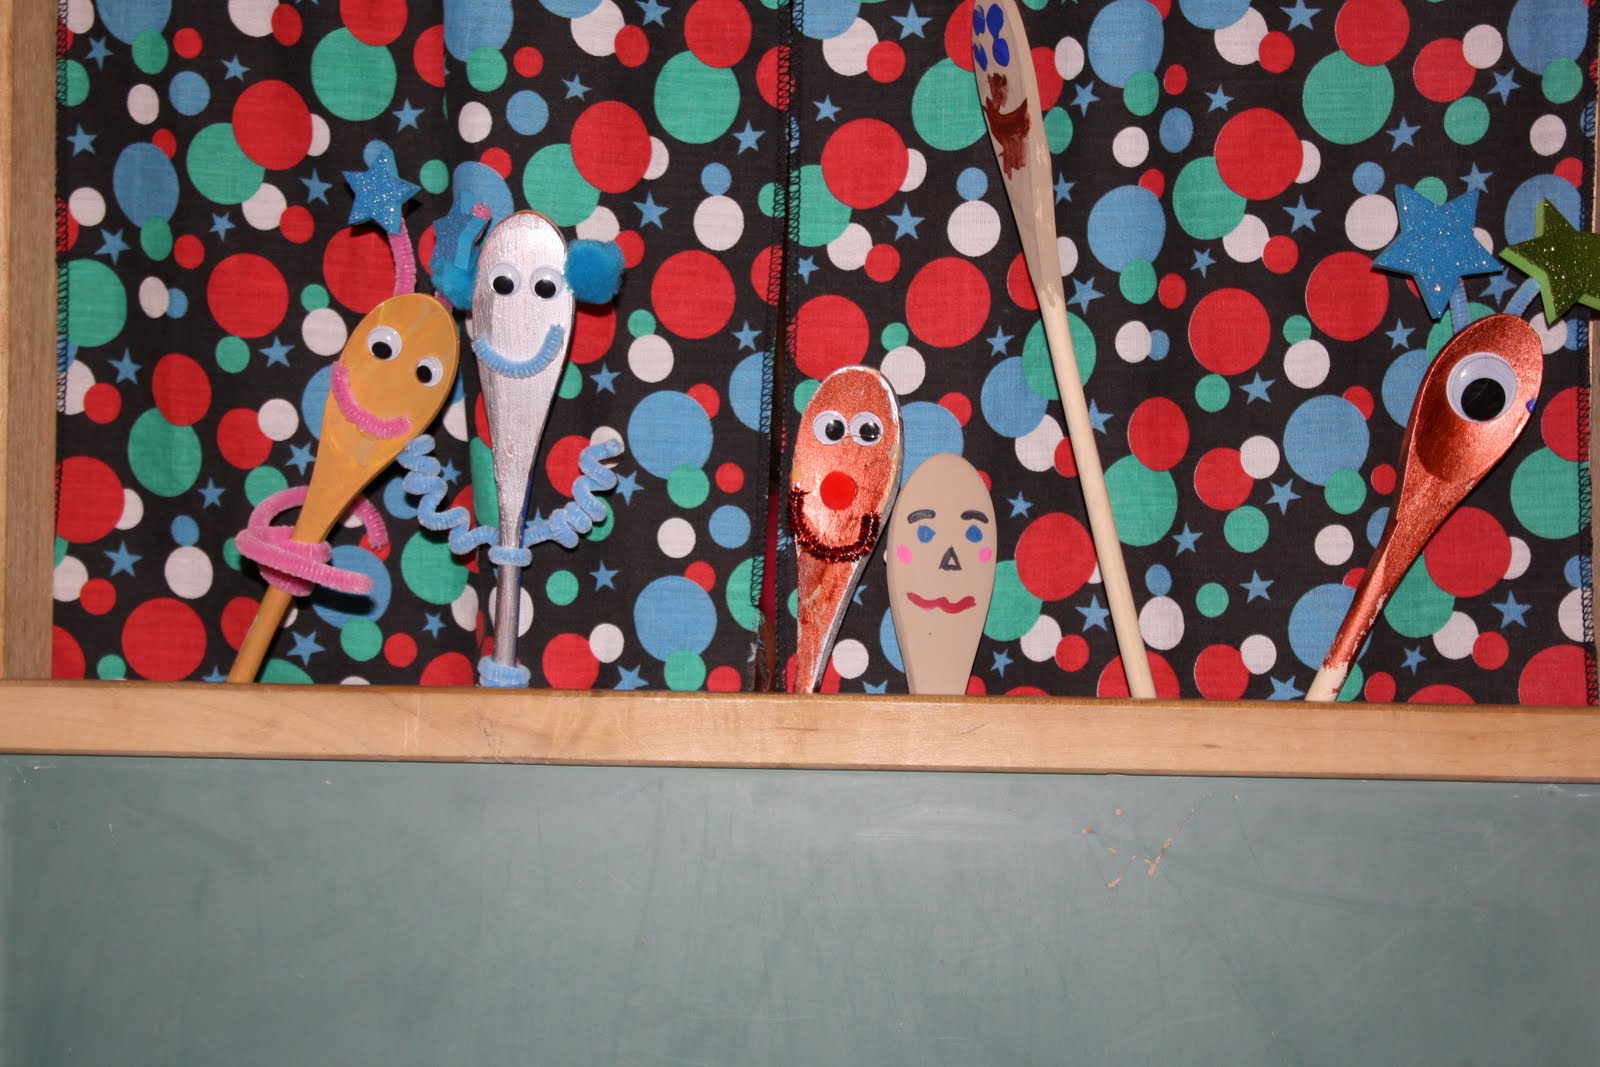
Wooden Spoon Puppets


Thursday, June 9, 2011
Tangled Party Favors


Saturday, March 26, 2011
Toilet Paper Roll Race car


I won't repost it, because the great idea can be found here.
Friday, March 25, 2011
Jello, Salt & Sugar


Friday, January 21, 2011
2011 Young Womens Theme Block
Even though it's been months since I was released from Young Women's I still miss it. I got asked to help out with a craft project for New Beginnings and jumped at the chance. These were pretty easy to make. In fact, we had the girls make them. We had them precut and sanded for them. I got the cute subway art from Melinda over at Under My Umbrella. She is seriously talented!!

We used 2x6 boards and cut them into 6 inch blocks. We had the girls paint the entire block black. Then we took a piece of scrapbook paper and modgepodged it onto the board. Then we took the subway art and attached it with modge podge to the front of the block. Add another coat of modge podge, tie a cute bow and you have a way cute reminder of the theme for the year!

I had a blast coming up with them. I tried making them in different sizes, but this was the cutest. It was a great project to be involved in. I came up with the idea and my friend and her hubby did all the gathering, cutting and sanding! I got to go and help the girls make them! It was perfect!
Tuesday, November 30, 2010
Tin Can Bow Holder

Simply adhere cute scrapbook paper around the can with modge podge. Use a hot glue gun to add ribbon running down the sides of the can. I glued the ribbon just inside the lip of the can and under the bottom. Embellish the top of the can as desired and wala, you have this:

A cute bow holder that can be kept anywhere.

Inside the can you put headbands, ponytails, anything that doesn't have a clip.
Tuesday, November 16, 2010
Easy Puff Paint

Monday, November 8, 2010
Teepe's


Thursday, November 4, 2010
Emergency Car Care Kit Tutorial
These are stinkin' cute!
I got one for Christmas last year and I love mine.
I decided to reproduce something similar.

I love the big chunky buttons and the cute potholders.
These cost me $3.50 a piece to make.


I whipped out 15 of these in 2 hours. All of the filler came from the dollar store and Walgreen's. This is an easy present to mass produce if you want to do them for Christmas.Happy sewing
Wednesday, October 20, 2010
Mock Halloween Canvas

There are lots of these kind of signs floating around the web right now. Lot's of fun subway art and great Halloween printables! Good luck deciding which one to make.
Monday, October 4, 2010
Candy Corn Wreath


Tie some pretty ribbon around it and you have a fun Halloween wreath. I am not loving the orange ribbon. I am envisioning some wide, black, glittery ribbon, so I will probably go and get it today and change it out. I found all the stuff I needed to make this at the dollar store and spent $3.00 for a cute wreath!
Thursday, June 24, 2010
The Best Applique Templates
 Aren't these cute? Makes me want to have another baby boy!!! So, I am still loving the applique's. I have a few others I am working on. But it seems that I am surrounded by friends who are having boys! Gotta stock up. I want to share some great sights to find free applique templates.
Homemade by Jill, she has the cute tie printable! There is a link to Martha website, and as always, she's got the goods!!
Planet Applique, has a ton of free appliques, plus some you can buy.
Better Homes and Gardens, has a HUGE list! However, you do have to sign up to access them. But that is free.
Free Appliques, has oodles of great templates. Everything from Christmas to baby!
Scherenschnitte, has these great templates, that are used for paper cutting, but could definitely be used for some appliques!
Martha's got two darling downloads on this post. A cute wren and a horse!
Wee Folk Arts, also has a ton of free templates and huge list of fun and free patterns.
Oh, and this guitar shirt is darling and she's included a free download!
Thursday, May 20, 2010
I've Been Busy
I got a new niece this week. I love babies. Who doesn't? There is something wonderful about holding a new little sweetie so fresh from heaven. Well, we didn't know what this baby was and so as soon as I found out, I started sewing.
 I didn't actually make this. My friend Shelly had it in her ribbon box, but we paired it up with the cute Minnie Mouse onesies below.
 Darling!! This is the first time I have ever done appliques. I pretty much just followed the directions on the wonder under and it turned out cute.
 She is a Mickey Mouse fan. HUGE! So I loved this. The only thing I wish I had done differently was put the bow on crooked. But it's cute.
 And of course a little, warm, snugglie, blanket!
 I didn't actually make this. My friend Shelly had it in her ribbon box, but we paired it up with the cute Minnie Mouse onesies below.
 Darling!! This is the first time I have ever done appliques. I pretty much just followed the directions on the wonder under and it turned out cute.
 She is a Mickey Mouse fan. HUGE! So I loved this. The only thing I wish I had done differently was put the bow on crooked. But it's cute.
 And of course a little, warm, snugglie, blanket!
 I love any excuse to break out my sewing machine!
Wednesday, May 19, 2010
Easy Graduation Ideas
 Bakerella has done it agian! These one's would be so easy!! Peanut Butter Graduation caps! Ingenious!
 So cute!! With graduation j ust around the corner, it's one you could defiently use! You can find these cuties over at Living Locurto.
Monday, April 26, 2010
Pinwheel Centerpieces

Our theme for this baby shower was spring.
Lot's of pastel colors,flowers and pinwheels.
Look closely at the table, there are tons of little 2 inch pinwheels on the table.
We had planned on making these for napkin rings,
but we ran out of time, so we just scattered them on the table.
It looked really cute.
The tins were empty Stephen's Cocoa Honeyville Farms smoothie mix cans.
We just modge podged coordinating paper to the tins.
So cute and easy!
To make the little pinwheels we cut the paper to 2 inch squares.
Then simply cut the four corners in at about 1 inch deep.
Then you fold the four corners down and glue them.
We used buttons to put at the center.
The big pinwheel is a 6 inch square.
We attached flat thumbtacks to the back.
We painted regular #2 pencils, for the stick.
Stick your thumbtack in the eraser and your done!
They are functional and spin.
Add some craft foam in the bottom of the tins
and top that with some shredded paper!!
These could be used for a variety of things.
Heck, my kids love pinwheels.
It's a great afternoon craft!
Saturday, April 17, 2010
DI Frame Extreme Makeover
This was pretty simple. I love this frame. I found at DI for $3.00.
 I wasn't really digging the Avocado picture. So I popped out the canvas. Attempted to find some glass to fill in the frame. Which took me months, mind you. I eventually had my husband cut some down with this teeny tiny glass cutter we have.
I originally wanted to leave the frame white, because I thought it had a tone of character, but in the meantime I rearranged my living room and the white frame, just wasn't working for where I wanted it. So I sanded it down a bit, painted black over the top of it and then sanded it down to give it a vintage look.
I used some E-6000 (Walmart craft section), which is an industrial strength glue, to glue the glass into the frame. I had purchased my vinyl from Scribble It months ago and when it was all ready, simply laid the vinyl on and here is the finished product.
 I am in love with it! I know the vinyl is on a bit crooked, my hubby reminds me often, but it has a lot of character. I am making something similar, but on a much larger scale from a sister-in-law. I love refurbishing DI treasures!
 I wasn't really digging the Avocado picture. So I popped out the canvas. Attempted to find some glass to fill in the frame. Which took me months, mind you. I eventually had my husband cut some down with this teeny tiny glass cutter we have.
I originally wanted to leave the frame white, because I thought it had a tone of character, but in the meantime I rearranged my living room and the white frame, just wasn't working for where I wanted it. So I sanded it down a bit, painted black over the top of it and then sanded it down to give it a vintage look.
I used some E-6000 (Walmart craft section), which is an industrial strength glue, to glue the glass into the frame. I had purchased my vinyl from Scribble It months ago and when it was all ready, simply laid the vinyl on and here is the finished product.
 I am in love with it! I know the vinyl is on a bit crooked, my hubby reminds me often, but it has a lot of character. I am making something similar, but on a much larger scale from a sister-in-law. I love refurbishing DI treasures!
Take some time to go and check out Scribble It. I have bought vinyl from Cammi several times and have alway's been happy with it. I love, love, love the metal nativity, which I bought this past year! It's a great sight with lot's of fun ideas!
Friday, April 16, 2010
3-D Poppy Picture
Okay, so I made this using the Poppy's from yesterday! I think it's stinkin' cute. My husband thinks I'm a dork, but he totally helped me make it. He cut the dowel for me and even glued them into the frame. I told him I could do it, but he loves me and wants to help me with my wacky ideas!
 There is no glass in the frame and it kinda pops off the wall. Hard to tell in a picture, since you can't make it 3 dimensional.
I just had the unfinished frame in my closet forever. I started this thinking about using it for a decoration for a spring baby shower, but I don't know that it is necessarily the direction we wanted to go. We have another idea for that, but I still finished it because I had started it.
 There is no glass in the frame and it kinda pops off the wall. Hard to tell in a picture, since you can't make it 3 dimensional.
 I just had the unfinished frame in my closet forever. I started this thinking about using it for a decoration for a spring baby shower, but I don't know that it is necessarily the direction we wanted to go. We have another idea for that, but I still finished it because I had started it.
What do you think?
Thursday, April 15, 2010
No Sew Felt Poppy Clips - Tutorial
 These are stinkin' cute! I have made poppies out of fabric before and had them turn out okay, but it was a complicated process with using a pattern and cutting them all out and it took forever. I made 3 of these in just under 20 minutes. They are that simple. I had a friend teach us how to make these at a Young Women's activity, but she had us sewing them together. I have made some like that, but using the glue gun is so much easier and they seem to hold up the same.
 Your going to need 6 circles cut out of felt, all the same size. These are 2 inches in diameter. I used a pattern that I had already made for silk flowers. Which will be hopefully posted on here next week!
 Your going to take a piece and fold it in half. You may want to put a dab of glue right in the center of that crease. I don't do that on every one, but sometimes they do unfold. Up to you!
 Then fold it in half again and stick a dot of glue in the fold to hold the petal in place. You will have a triangle shape petal.
 Take one of your pieces of felt and put a dot of glue and glue your petal on. Repeat this step with the other 3 circles. I like to do the first two petals right across from each other and then fill in the gaps with the other 2 petals.
 This isn't a great picture, but this is what it will look like. If you have any edges sticking out, you will just want to trim them off. You can leave it just like this, or.......
 Glue a cute button into the center. I love buttons! Place your last piece of felt in between the prongs of your hair clip. Smother the top of the felt with hot glue and attach it to the back of your flower.
 This is seriously so easy and so cute! You can use them to embellish, purses, clothes, and just about anything you want. Tomorrow I am going to show you another use for them!
Wednesday, April 14, 2010
New Moon Cupcake Picks

I made these for a baby shower! That's right folks, a baby shower. My friend Shelley asked me to help her out and make some cupcakes for a baby shower she was throwing, the day that New Moon came out.
 I think they turned out way cute! I only did Edward, because both Mommies-to-be were Edward fans.
 I saw the idea to use forks as the picks somewhere online. I can't remember, but it was on several different sights. We cut about half the handle off the forks off so they wouldn't be so long. I got the silhouette graphic from Pin and Paper. Everything else I made using Lettering Delights products. It is seriously one of my favorite places to get fonts and I buy the graphic kits too, because they are super cute. (And they have lot's of freebies!!) I was able to get these during their dollar day's sale! I bought all of the Twilight fonts and the Edward and Jacob graphic sets. The twilight and Team Edward picks, I just made up with my fonts.
 I think they turned out way cute! I only did Edward, because both Mommies-to-be were Edward fans.
 I saw the idea to use forks as the picks somewhere online. I can't remember, but it was on several different sights. We cut about half the handle off the forks off so they wouldn't be so long. I got the silhouette graphic from Pin and Paper. Everything else I made using Lettering Delights products. It is seriously one of my favorite places to get fonts and I buy the graphic kits too, because they are super cute. (And they have lot's of freebies!!) I was able to get these during their dollar day's sale! I bought all of the Twilight fonts and the Edward and Jacob graphic sets. The twilight and Team Edward picks, I just made up with my fonts.
I used a 2 &3/4 inch punch to cut them out. Then I thought they were to plain, so I just took a red and black stamp pad and went crazy smudging the edges. I think my favorite one is the Volvo, that say's "stupid shiny Volvo owner,"
I also toyed around with just putting quotes on the picks, but it just didn't feel right. I seriously agonize over making things for other people. It gives me major anxiety, but I think they turned out pretty cool!!
Subscribe to:
Posts (Atom)


